This weed growing schedule is designed to be used starting in the first week of the vegetative phase for people who are growing in soil that was already fertilized when purchased. If you are at the very beginning stages (germination, for example), then you should start with this article about germinating and then return to this growing schedule.
It’s a good idea to read through the entire schedule so that you can see what to expect in the future weeks to come. If you are growing in a medium other than soil, check out our other grow schedule about Growing in Hydro.
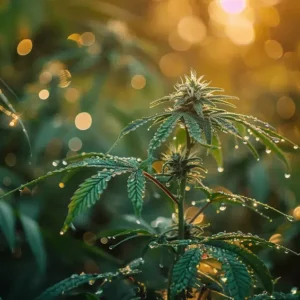
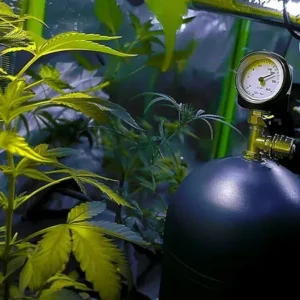
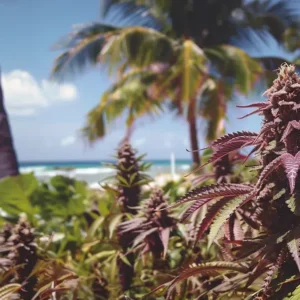
All images in this article are powered by Bergmanslab.com, my online cannabis training course.
I used the following items for this setup:
- 48” x 48” grow tent
- 9 White Widow seeds
- 4-gallon containers
- Gold label special mix soil
- Flower Power nutrients
- One 400-Watt MH light (for the vegetative phase)
- One 600-Watt HPS light (for the flowering phase)
If you’re looking to start growing or just want a nice windowsill set-up. Be sure to check out my friends from a Pot for Pot!
Download my free Grow Bible for more growing tips
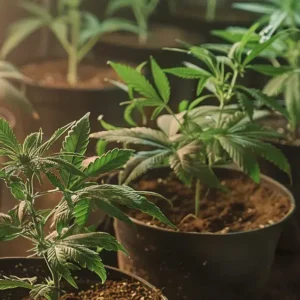
Week one of the vegetative phase
- Amount of light: 50% of the lamps on (MH)
- Light distance between lamp and plant: 40 inches for a 400-Watt lamp
- Light duration: 18 hours per day
- Temperature during the day/night: 73/64 degrees Fahrenheit
- Humidity level: 70%
- Watering schedule: 250 mL per plant, every other day
- pH level: 6.2
- TDS/EC: —


This first week is all about your young plants getting acquainted with the strength of the light schedule. If you have more than one lamp, only have half of them on for this first week. Using an MH lamp is best for the vegetative phase because they have more of the blue and white light spectrum than an HPS light, which is what plants in this stage need.
Be sure to always keep a close eye on the temperature and humidity, checking it every other day at a minimum. The pH level should also be closely monitored, kept between 6.0 and 6.5. The pH level is how acidic or alkaline the water is, and it has a strong effect on how your plant’s roots are able to absorb nutrients. In other words, it is critical.


When watering your plants, give them enough water so that some begins draining from the bottom of the pot. Then stop watering and wait until all the water has been used up by your plants. If the pots are bigger than four gallons, make sure to feed them less water, as overwatering can happen very easily in a larger pot.
More about this subject in my article “Watering marijuana plants“
Water them every other day after that, but you will need to vary the amount of water according to a variety of different factors. This includes temperature, plant size, humidity level, and so on. Do not feed any nutrients to your plants yet because they are still using up the nutrients originally included in the soil. You should keep spraying your plants daily to maintain healthy humidity levels.
Ready to grow your own marijuana plants but just starting out? Make your first grow a success – buy beginner cannabis seeds here.
Week two of the vegetative phase


- Amount of light: 100% of the lamps on (MH)
- Light distance between lamp and plant: 20 inches
- Light duration: 18 hours per day
- Temperature during the day/night: 77/64 degrees Fahrenheit
- Humidity level: 70%
- Watering schedule: 500 mL per plant, every other day
- pH level: 6.2
- TDS/EC: 500/1.0 (FP Start)
Turn on all of your lights for the second week of your marijuana plants’ vegetative phase. Move them closer to the plants as well (20 inches above them instead of 40 inches), but hold your hand underneath the light to make sure it’s not too hot. If it’s too hot for your hand, it’s too hot for your young plants.
Read my article “How to transplant marijuana plants” for more information
If need be, you can transplant your marijuana plants at this point. The bottom of your pots will be the indicator: if roots are poking out from the holes in the bottom, it’s time to move your plants to a bigger pot.


At this point in the vegetative phase, you can start giving your plants some nutrients. Use Flower Power Start or another type of nutrient that is high in nitrogen.
You can also start topping or fimming your plants during this week of growth since they are mature enough to handle it and young enough to grow significantly afterward. Do the proper amount of research before attempting any pruning technique.
Also read my article “How to prune marijuana plants“
The pictures below are just an example, I didn’t prune these white widows.


During this week, you should also place a fan in your grow room and aim it right over the plants, so it’s touching the tops of them a bit. The plants should all be moving in the wind a little bit, as that helps to strengthen their stems.


You will know it’s time to begin the flowering phase when the leaves of your plants are touching each other, leading to a green blanket of sorts when looking at your plants from above. There should be no light hitting the floor (since that’s just a waste of light).
Week one of the flowering phase


- Amount of light: 50% of the lamps on (HPS)
- Light distance between lamp and plant: 20 inches
- Light duration: 12 hours per day
- Temperature during the day/night: 77/64 degrees Fahrenheit
- Humidity level: 60%
- Watering schedule: 1 Liter per plant, every other day
- pH level: 6.2
- TDS/EC: 600/1.2 (FP Grow)
You will begin the flowering phase by lowering the light duration from 18 hours per day to 12 hours per day. This makes the plant “think” that fall is on its way, causing it to begin the flowering phase.
You won’t see any flowers or major changes for a few weeks still, but be sure to stick to the schedule because changes are happening.
“Cannabis is photoperiodic-reactive; flowering can be controlled with the light and dark cycle.” ~ Jorge Cervantes
It is at this point that you should switch to the HPS lights. As opposed to MH lights, HPS lights have more red and orange light, which is consistent with the right light spectrum for the end of summer and beginning of fall season. Therefore, they are best for this stage of your plant’s growth.


Even though your plants are now in their flowering phase, they will still be growing and using lots of nitrogen, so make sure the nutrients you give them are the same as before — highest in nitrogen. Once the flowers begin developing in future weeks, you can change up the nutrient regimen.
Aim the fan so it’s blowing the space between the plants and the lamps. This helps the hot air dissipate around the room. Before you water your plants again, make sure the soil is a bit dried out first.
Feed your plants from below by spraying an inch of water onto the base, where the roots will reach and grow faster.
Keep a close eye on temperature and humidity. Check your plants often for any leaf changes (discoloration, damage) as that could mean there is an infestation, a nutrient issue, or a watering issue. All of these issues need to be addressed as soon as possible, so it’s crucial you keep a close eye on your plants.
Week two of the flowering phase


- Amount of light: 100% of the lamps
- Light distance between lamp and plant: 20 inches
- Light duration: 12 hours per day
- Temperature during the day/night: 79/67 degrees Fahrenheit
- Humidity level: 60%
- Watering schedule: 2 Liters per plant, every other day
- pH level: 6.2
- TDS/EC: 650/1.3
At this point, you should stop topping your plants, but you can still do other forms of pruning, such as removing the side shoots from the bottom of your plant, allowing the plant to maximize its resources on the other shoots, leaves, and buds.
Also read Pruning cannabis plants
You have likely noticed that your plants are growing very quickly. For that reason, be sure to measure the distance between your plants and the lamps every other day and adjust as necessary. You can see signs of your plants getting too warm when their top leaves are curling or becoming discolored. If that happens, raise up the lamps or turn up the extractor.


The TDS should increase by 50 every week, and the EC by 0.1. Watch the plants’ reaction when you make these changes, and rinse the soil after this week so you can switch to a nutrient regimen that is highest in phosphorus at the beginning of week three of the flowering phase. To rinse the soil, simply water your plants with water that is at a 6.5 pH level and has no added nutrients.
Week three of the flowering phase


- Amount of light: 100% of the lamps
- Light distance between lamp and plant: 20 inches
- Light duration: 12 hours per day
- Temperature during the day/night: 79/67 degrees Fahrenheit
- Humidity level: 60%
- Watering schedule: 2 Liters per plant, every other day
- pH level: 6.0
- TDS/EC: 700/1.4 (FP Bloom)
You should start seeing the beginning stages of flowers developing on your plants during this week. They will start as little hairs that will develop into balls with hair on them — these will eventually turn into actual buds. The plants are now using all their energy and resources for bud development.
Keep the temperature, humidity, water, and nutrients all at the right levels. Monitor all of this closely, since this week is when the number of buds is determined — that makes it a very important week.
Healthy plants will produce more buds.


Your plants are going to need more phosphorus now that their buds are starting to develop. Use a bloom fertilizer (like Flower Power Bloom) after rinsing out the soil. This allows your plant to absorb lots of phosphorus right away, which leads to a good foundation of growth for its buds.
Your marijuana plants are now at the point where they are consuming the highest amount of water. For that reason, be sure to keep the soil moist at all times, and feel in the middle or bottom to see that it’s remaining moist there as well.
Hopefully, you have already removed the male plants (if you’re growing with feminized seeds); otherwise, they will fertilize the females and cause those female plants to develop seeds rather than buds (therefore lowering the quality of buds).
Week four of the flowering phase


- Amount of light: 100% of the lamps
- Light distance between lamp and plant: 20 inches
- Light duration: 12 hours per day
- Temperature during the day/night: 79/67 degrees Fahrenheit
- Humidity level: 50%
- Watering schedule: 2.5 Liters per plant, every other day
- pH level: 6.0
- EC: 1.5
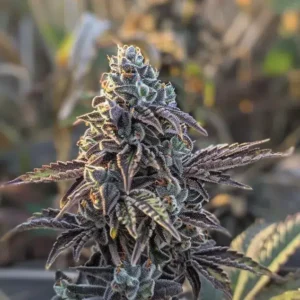
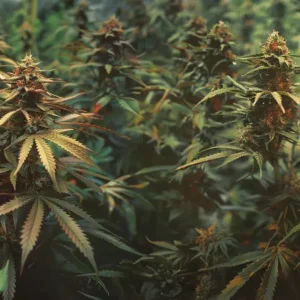
You will start to notice the hairy balls starting to increase in size, perhaps beginning to resemble actual buds. You will also see little buds forming at the base of the marijuana plants. Keep an eye on the distance between the lamps and your plants, ensuring that your plants are getting tons of light but not so much that they burn. Use your hand to check the temperature.

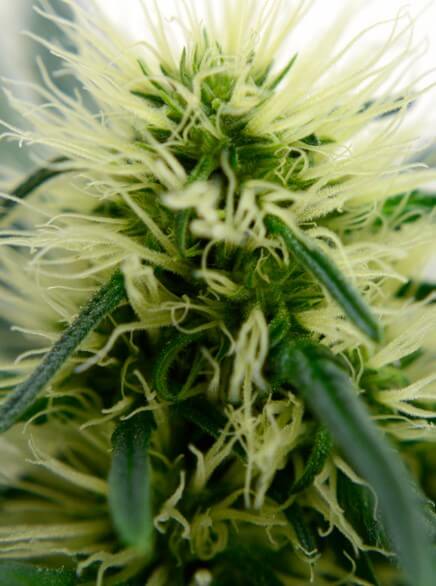

Small buds grow bigger – powered by bergmanslab.com
Keep monitoring the humidity and temperature, the leaf color and shape, and any indications of bugs. Anything at all that seems strange should be checked right away with my online symptom checker.
Week five of the flowering phase


- Amount of light: 100% of the lamps
- Light distance between lamp and plant: 20 inches
- Light duration: 12 hours per day
- Temperature during the day/night: 79/67 degrees Fahrenheit
- Humidity level: 50%
- Watering schedule: 2.5 Liters per plant, every other day
- pH level: 6.2
- TDS/EC: 800/1.6
You will see significant bud growth during this week. Make sure there is still plenty of water for your plants (they will still be using tons), and that all the other environmental factors are kept perfect.
Your plants may start to need some external support, such as plant sticks. This is because their buds will get so heavy that they might start affecting the plant itself. Don’t let them fall over!


Keep the fan going (rotating) to keep the flow of air constantly moving. You don’t want any spots of hot or cold air to be stuck anywhere, as diseases and mold can easily develop in those places. Airflow also aids in the movement of carbon dioxide, which your plants need plenty of.
Flush your plants with water that is at a pH level of 6.5 at the end of this week. Don’t include any nutrients. You will begin boosting your plants with a new nutrient regimen next week.
Week six of the flowering phase


- Amount of light: 100% of the lamps
- Light distance between lamp and plant: 20 inches
- Light duration: 12 hours per day
- Temperature during the day/night: 79/67 degrees Fahrenheit
- Humidity level: 50%
- Watering schedule: 2.5 Liters per plant, every other day
- pH level: 6.2
- TDS/EC: 850/1.7 (FP Bloom + FP Booster)
Your plants are going to need more potassium to ripen and harden their buds, so you should add in Flower Power Booster to increase the amount of potassium they have access to. This will have a positive effect on the marijuana quality and quantity as well.
You will begin to notice the pistils turning from white to orange or brown in color. Keep an eye on these, as they will indicate when you should harvest your plants. Once about 80% of the pistils are brown or red in color, the harvest time has come.


Besides that, you won’t notice too much happening from the outside. You need to maintain the environmental aspects to keep the perfectly healthy environment for your plants. Also, keep a close eye on your plants for any signs of mold, diseases, or pests.
Week seven of the flowering phase


- Amount of light: 100% of the lamps
- Light distance between lamp and plant: 20 inches
- Light duration: 12 hours per day
- Temperature during the day/night: 79/67 degrees Fahrenheit
- Humidity level: 40%
- Watering schedule: 2.5 Liters per plant, every other day
- pH level: 6.2
- TDS/EC: 750/1.5
The buds will still be increasing in size, and they will also be ripening more. You can expect lots of resin, as well as dense, heavy buds to come out of this week’s growth. The pistils will continue browning but remain patient, so you don’t harvest too early (as that would have a negative effect on the quality of your weed).


You might begin noticing that the bottom leaves start to yellow and die, but that’s normal and nothing to worry about. Keep feeding your plants the normal amount of water. Lower the amount of nutrients you’re feeding them by a bit, then flush your plants out with water (pH 6.5) towards the end of the week. Don’t give them too much in the way of nutrients next week.
Week eight of the flowering phase


- Amount of light: 100% of the lamps
- Light distance between lamp and plant: 20 inches
- Light duration: 12 hours per day
- Temperature during the day/night: 79/67 degrees Fahrenheit
- Humidity level: 40%
- Watering schedule: 2.5 Liters per plant, every other day
- pH level: 6.2
- TDS/EC: 250/0.5
This is the week your plants are going to be harvested. More pistils will be browning, and your plants will be absorbing less and less water — both are indicators of your plants being ready for harvest.
Our free little Harvest Guide will help you determine the best moment to cut your plants. Download it here.
Lower the EC dramatically, so your plants won’t have the nutrients in them at the time of harvest. For the last few waterings, only give your plants pH 6.5 water without any nutrients at all. This helps rinse out the soil as well (meaning it could be used for another round of plants).


Keep a close eye out for bud rot. Brown leaves will be growing from buds with bud rot, and they will come off extremely easily if you pull on them gently. Open the buds gently to look inside. If there is rot, take the bud off of the plant right away. Be sure you’re wearing gloves and make no contact with the other buds (since it spreads very easily).
Download our free Ganja Livity lifestyle guide to learn more about rolling perfect joints!
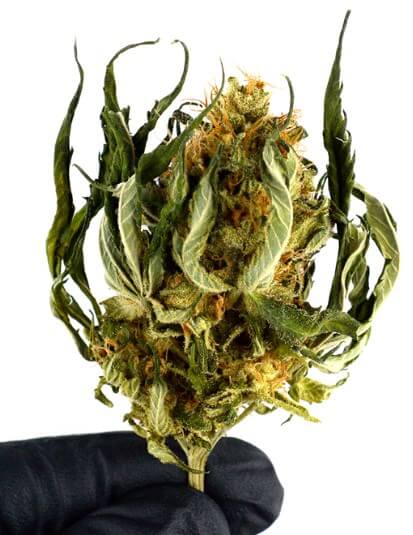
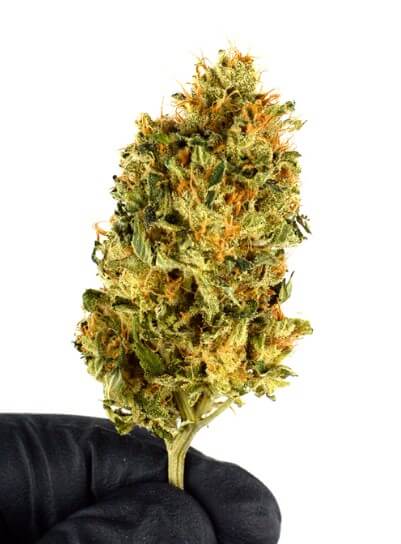
Here is a little picture gallery from the harvest. The yield was 18 ounces (505 grams) so not bad at all. Please leave questions or comments below in the comment section.


How much do you yield on average? Do you trim wet or dry? Share your tips, comments or questions in the comments below…

Buy Blue Dream Seeds
- 20% Indica 80% Sativa hybrid
- High THC levels up to 21%
- Consistent heavy yields
- Easy going high for everyday use
- Feminized seeds for guaranteed bud
Robert


Good information there! Kinda goes along with what I’ve experienced over the past several months. I’m starting my third grow this weekend. Using ILGM seeds in my 2×4. Doing two plants in Octopots. One Blue Dream and one Skywalker OG, unless I change my mind, lol. This will be my first ILGM grow. First grow April 23, I did 5 plants each in 5-gallon pots and harvested 16.3oz. Awesome for first ever grow! Hoping these two ILGM seeds fill this tent up and produce at least 1 pound in my 2×4 again.
Hi James,
We’re happy to hear this!
Keep us posted on your grow and let us know if there’s anything we can do for you!
Happy growing,
Alex ILGM
I purchased some fertilizer from your company and it did not indicate how much water to use with each packet . One gallon five gallon extra.
On an average I harvest 16 grams or 1 oz. per 150 watts of light. So, with a 600 watt hps lamp I’m producing 4+ oz. with a 2 plant grow in 5 gallons of soil.
… 5 gallons of soil (per plant).
Happy growing
How do I cure pm in week 5
Hi! Im answering your questions..i wet trim and I average about 5 ounces per plant. More if I keep up with my co2 tank in veg.
18oz? You are saying the entire plant was 18oz before drying? The plant in the picture produced more close to 1.5-2 dry ounces right?
What kind of yield can you get from a plant that has vegged for two weeks? I have indoor plants that are 90-120 days old from seed or cutting clones before I even consider transitioning to flower. Granted, they are HUGE by harvest and generating 4-5 oz each (4 plants fill every inch of a 5×5 tent). Am I missing an opportunity for more turnover? I am trying to calculate the most efficient time-to-yield ratio to save $$ on inputs like nutrients and electricity. I do find myself holding plants in veg and smaller pots until space opens up in the flowering tent because I haven’t nailed down a proper scheduling rhythm.
It would b helpfull to know if where it says “watering schedule”,(every other day) if this means water with nutrients added(feed)or just water? I personally I feed then water, feed then water, sometimes feed, feed then water and try to test the run off to see if they need more food or to continue with just water, too much food can lead to ph and other probs, not enough food can lead to Deficiencies? This is ultimately the skill to master? Reading what a plant needs is difficult, by time the plant shows signs, u have a problem to deal with? Can pls make this clear, as this is confusing to new growers like myself and have learnt the hard way. Flushing plants can ruin them and set u back weeks.
nice article,, Please note that is is the time schedule for ruderalis (auto-flower) Veg stage is atleast 4 weeks. clone or seed. This article totally skips over the aeon where you scrog and LST the plants..
Hi, i was wondering what changes would i need for a auto grow as they start flowering long before others do.
Ray, Place the fixture any way you want. Use common sense, and; I Advise You To Join Us Here: Support.Ilovegrowingmarijuana.Com
Rich.
you can join and post here after you develop your menbership
Join Us Here: Support.Ilovegrowingmarijuana.Com
A room 4.5 x 5.5 . Batwing adjustable fixture. Which way to mount fixture?
Thank you brother for shar the love of grow i have bee away from it since 1993 and words cant Describe the love. Your bus plan rocks with the website etc. not sure if i can post pic but want to say rhanks and great job Sir
Marco, Adding Molasses is not helping much unless you use it in a compost tea, or a tea. So many experiments going on these days. Good Luck with your grow.
Erv, Defoliation can be harmful to your yield if you do not know what you are doing. I assume your are talking about stripping the whol;e plant. I do not agree with this method; IMO. Make sure you do a lot of research before you attempt this. As far as removing lower useless branches in the under canopy. Go for it but, do not remove too much at any one time.
I’m on my first full canopy with a 3/4 canopy beside it. Total of 7 plants. 4 in 15 gallon organic soil. Preliminary true living soil in 3 pots. Added night crawlers and red wigglers, some beneficial insects and nematodes. Flowers are rock hard and lumpy on the canopies surface. Below the canopy smaller but not popcorn quality flowers. I am harvesting in stages. I don’t give any nutrients aside from molasses and sea Kelp along with Recharge. To keep the soil alive. That’s it. The small rough samples are something to be reckoned with. Alien OG and Holy Grail. I began like everyone else with nutrients. Some success and more not. Never again. I can do it well now but nothing compares to true living soil or organic Cultivation. I’ll update the final yield.
What is your take on the defoliation during flower during veg
michelle,
Best way to help you, is to have you join our support forum where we can clarify your issues through pictures and a daily discussion.
im very confused. i am growing an autogrow and i began with 2 plants on the same day. and that “sister”plant has since grown flowered and im currently in my 2nd week of smoking said plant. NOw this plant is just into its 3rd week of budding and it seems to be going even slower now. lol its huge. im 5 ft tall and its as tall as me and just the same around. i would be so sad to throw away. but i dont know if i can keep wasting nutes and time if im not going to get a crop out of it. im so sad and confused. please tell me what should i do?
You mention the amount of water To be feeding but dont mention anything about pot size or transplanting into bigger pots( starting and end pot sizes).
Robert, Thank you so much for giving me confidence to try this. I’m 4 weeks into my first Grow’s Flower stage and everything has gone perfect, just how you said it would by following your instructions. my plants look just like the pics you’ve posted. I’ve still got a ways to go but so far i’ve learned alot and continue to follow your instructions. every seed germinated and on time! I even put the trim in Clone plugs and everyone of them grew roots within scheduled time frame! I’m on a roll here. Thank you again. sincerely, Catherine
I have super skunk from auto. 6 atemps and phototron. This plant takes about 13 weeks to harvest. Used super soil. Doesn’t require nutrients. Your detailed illustrated guide is Best. How can I adjust for my conditions?
I have super skunk from auto. 6 atemps and phototron. This plant takes about 13 weeks to harvest. Never looked the same as yours. Used super soil. Doesn’t require nutrients. Your detailed illustrated guide is Best. How can I adjust for my conditions?
I have super skunk from auto.6 atemps a phototron. This plant takes about 13 weeks to harvest. Never looked the same as yours. Used super soil. Doesn’t require nutrients. Your detailed illustrated guide is Best. How can I adjust for phototron.increased growing time?
For grow mentoring; All here should join our support forum. Happy growing 🙂
Can I flush me girls with Black strap molasses right to the end as you’ve said no nutrients at all ? I would appreciate your advice. Thank you
Shaun,
NO. Molasses needs to be broken down in order to be available to the plant. The only thing you will get by doing this is “bugs”
Please send more information on growing outside. Not able to grow inside at this time.
Robert,
Join our forum to learn to grow outdoors. The forum is a learning environment. We are not set up here in the blog to do grow mentoring. Thanks
Imagine using RO water with a nutrient system and never having to check or adjust pH or TDS.
You guys who have been doing this for a long time are mired in the past.
You don’t mention LED lights, or even more importantly, LEC lights.
Your knowledge has helped me, but are looking pretty old fashioned to me, and I’m 65.
peace
Using RO water does not give you a guaranteed PH in any way, shape, or form. You will always need to check and adjust PH, unless you have been using the same water over time and have determined by properly measuring the solution that it is always within the proper range.
Is the TDS & EC & pH rating after adding nutrients?
It is alweays and everywhere.
Water has a TDS/EC value and after adding nutrient it get stronger (higher TDS/EC value
TDS = total dissolved solids
EC = electro conductivity
These are merely 2 different methods for measuring solution strength.
PH can change as well when adding nutrients because, some nutrients contain a PH buffer.
Great guide! My only question is how to you get that much growth between week 3 day 5 to week 4 day 1? Looks like another week or 2 worth of growth to me.
Brian,
Optimum grow methods and environment. During different cycles, we can expect different growth rates.
What exactly do you mean when you say, “Feed your plants from below by spraying an inch of water onto the base, where the roots will reach and grow faster.” Are you saying fill the overflow trays with an inch of water? Thanks
J,
Many growers “bottom feed”, a method that allows the solution to be leached up into the pot instead of top watering. Another matter of personal choice.
Awesome article, saved it to my bookmarks
I’ve introduced automation CO2 to my grow. Will the co2 kill critters in my tent? Gnats nutes etc..?
Popful,
Co2 can kill critters. You have to seal off the tent to allow the Co2 to envelop the entire air space, and push all air out. Some people do plants indivually in big blakc garment or contractor bags. Bag has to be sealed with Co2 generation of some kind, and as the Co2 which is heavier than air fills the bag, the Oxygen will be pushed out. Leave plant for most of a day in the bag before opening, and critters should be gone. I f you want to join our forum and call on me; I can probably supply you with some links for research.
Hey I think you harvest too soon. My experience with my setup is 8-9 weeks flowering after the stretch and white hairs start forming. Not right at the 12-12 switch
Brian,
Actually; To be real, the time expressed 8-9 weeks is only a guideline. You harvest by monitoring the trichomes and the % of clear, cloudy amber trichomes; Which is a matter of taste and desired affect. There is not exact predated time to harvest. Some Indica strains will be ready in 8-9 weeks from 12/12. Sativa can take 11-14 weeks. It all depends on the maturity of the trichomes and what affect you want.
I agree, week 3 in his flowering phase was more like week 1 of true flowering. It takes anywhere from 3-14 days (typically 5-8 in experience) to fully transition into flowering. At week 8, these plants were harvested before the the hairs even began to recede, which is a true sign of ripening of the flower. Should have ran them another 10-14 days, imho.
Hi all im a new grower im usin a 300w roleado full spectrum dimmer grow light in a small handmade closet 2 chocolate chunk plants wk3 of flowering usin 3gal fabric pots with new horizon compost and my roots are growing out of the bottom of the pots wot should i do abt this please
Are you using plant saucers to keep water from flowing on the floor? If you are in a saucer and can keep light off the root ends, you should be fine.
Otherwise; Get a bag of soil, compost, whatever, andcut the bag in 1/2. Once you can stand both ends of the bag up. Place your entire plant…pot and all…in the new bag of fresh medium. The roots can thrive in there.
Another thought is; If you want to finish and not have space or height issues. Leave it in the 3 gallon pots, and deal with the roots, trying to keep them from direct light or drying.
A few roots won’t hurt because, they are only going to provide new growth, and maybe you do not want any more new growth. Good luck.
i want aouto flower light cycle and life cycle and watering pleaseeee
Thank you for all your tips about growing. I’ve grown outside my whole life, 30 years, but I live in a place, where, as you said, you are 100% sure what it is you smelled! It it an altogether different thing to grown inside, my first three crops were unspectacular, the fourth unusable, and this time I’m going to get it right! I was thrilled to get my seeds in the first place, I tried this before, and got a nice empty greetings card with a stamp from the U.S. customs! Yours worked!
I usually get a solid 1lb from 6 plants in my room
well first wanna thank you for having me. love your work and teaching i have a 4x4x8 tent have the 400watt system also400 watts of cfls before got my tent was trying very hard but only got males or hermmies the tent made the world of difference i’m on my third grow in flowering of 2 weeks now only got 3 ladies this batch, but are doing wonderful ( growing like a weed )haha thanks to reading a lot I learning more each day .with tent no have grown 4 first, 4 second, and these 3 this last in flower also have 6 in veg.about 4 notes tall 5in. I heart growing marijuana !!!!!!!!!
I’m just going by the instructions above, which calls for those Ph’s and it has eliminated all my problems from when I was adjusting Ph to 6.5
Rod,
I ti sounds to me like all is well in your grows. As far as when you adjust PH. An hour is a benchmark for stability as ling as you are using water that cooperates.
Happy growing. Join the forum 🙂
I noticed on weeks 2 and 6 of Flowering, when I flush the Ph coming out the bottom is usually around 6.7–6.8. It takes a lot of water to bring them down to 6.0 and 6.2 respectively.
Even though I use the proper Ph when feeding, the Ph will climb on it’s own.
Is there a quicker way to flush? It’s not until all the nuiterants are washed out that the Ph will adjust but WOW! What bud. Big healthy and of course well worth the time it takes to flush and readjust to the proper Ph.
I use Ph Down and buy it by the gallon. But it still takes at least an hour and approximately 25 gallons of water, or more, to bring the Ph down to 6.0 or 6.2.
This seems to be a lot of time and Ph Down for 2-1/2 gallon buckets. It’s not until the soil drains clear that that I am able to reach the targeted Ph. There has got to be a faster way. I’m 73 years old and handling these pots is hard on the back and I have a very bad back.
Any suggestions will be greatly appriciated
Rod,
Your comments are very confusing.
IN soil PH should be 6.5-7.0
You do not need to flush in flower. Why are you wasting so much water and nutrients by flushing all the time?
You need to join our forum. ilovegrowingmarijuana.nl and we can share the proper methods of growing with you. We are not set up to provide the support you need here in the Blog comments. See you at the forum. Peace
I’m following the instructions on Ph and flushing. It calls for flushing the 2nd week of bloom and the end of week 5 with Ph at 6.2 and 6.0 respectively with a 6.5 during the last days of bloom.
I must say that these instructions eliminated all the problems I hadwhen I was setting my Ph at 6.5.
My bud is now bulky and big and the plants can’t be any healthier.
https://ilovegrowingmarijuana.com/growing/grow-schedule-soil/
Is it ok to start hydroponically then transfer to soil.
Lisa,
You can start hydroponically, and then transfer to soil. I am not sure why you want to go that route. It seems ludicrous to start in hydro and then remove plant from such a nice sterile environment only to shock it by sticking it in soil.
It can be done, and you should be OK if you choose this route.
God Luck
I was curious as to what size pot you started them in and transplanted into?
People who have 2 or 3 different plants going at the same time, problem, distance of lights, you may cause stretching, and a lot of grief trying to keep all the plants somewhere even in height.
How to tell when its the first week veg stage?
With that bud you take one hit and you become the couch
I never trim before I dry found it’s easier to trim after it’s dry. One question any one here ever grow nitro express I’m having a hard time with it and when to harvest after 4 grows of it the trichomes are still turning amber after week four of an 11 week strain when I harvest the buds and plant look like I covered it in maple syrup lol
Hi J, you probably have more luck finding someone with experience using nitro express on the support forum. Best hop on there and ask around 🙂
Hey, I am one my 3rd grow, and everything you said is true, I found out the hard way. Only one thing, please trim before drying maybe ?
Craig Malone,
With a little effort taller more vigorous plants can be trained (tied) down with little or no effort in order to maintain a consistent canopy.
Happy growing
Join our forum at ILGM. We have many helpful and knowledgeable members always willing to help.
I always trim before drying. To me, it’s much easier when the leaves are full of water and stiff. The dry trimming is way too diffacult to get a real nice liiking bud. Plus, I leave about a 3/16″ on the bud because they are full of trichs.
This is the best marijuana grow site on the internet. Hats off to Robert and his crew. I put 8 seeds purchased from ILGM in water until they sank (18 hours+/-). 2 Blueberry Autos, 2 Northern Lights Autos, 2 Amnesia Haze Autos, and 2 Pineapple Haze Photos. Placed them in Light Warrior and Ocean Forest mixed with perlite. 3 Days and all popped through the soil. 100% germination. I couldn’t be happier. Day 17 from breaking through the soil and the Autos are working on their 3rd node. Super healthy under a Platinum 300 LED @ 34″ above the plant. Great seeds, great info, great company! Keep up the good work. I’m a customer for life.
Awesome Luke! I know people on the forum would love to see how your autos progress, perhaps you could start a grow journal? 😀
Thanks! We love all motivated human beings! 🙂
I love these kinds of overview articles!
How many nodes should my plant have before starting the flowering stage? I have 1 OG and 2 Afgan. Also what nutrients do you recommended i should add I’m only using RO water with a PH at 5.7 and their doing fantastic.
Tobi,
I recommend you use Robert’s Flower Power nutrients. Determining when to flower is a choice made by figuring how much room you have.
What are the dimensions of your available grow space? How much head room do you have available to house your lamps and evacuation fans.
Join our forum. 🙂
What does TDS/ec mean?
Got my seeds about a week sooner than expected. All but a few germinated overnight and the rest by day 2. All but one made it once put in soil and now they’re growing like weeds! Quality and service you guys provide earned my business for a long time to come. Thanx & Enjoy!
Awesome Nick! Happy growing! – I❤️GM
Ben,
I do not suggest spraying the plants past seedling stage, unless you develop an issue that requires a foliar application to resolve the issue.
Happy growing, 🙂
My question is whether or not it is appropriate to continue spraying the plants with water throughout the grow, as I do not want to facilitate bud rot. Thank you.
excellent germination of 100% WW & GL seeds and the seedlings are doing very well
Awesome! We’d love to see your progress on the forum 😀
I am a novice grower so very excited to start my first grow n a few days. Im nervous about nutrients. I have auto flower seeds, so my question is do I start giving nutrients at the veggie state? Im using fox soil, and fox nutrient.
Jonseynselfie,
Using FoxFarm soil; You do not need to add nutrients until plants are a month or so old. You must allow the soil to be depleted to some degree before adding nutrients that will create a toxicity, or be wasted because plant only takes up what it needs.
Join our support forum. You will love our friendly knowledgeable community 🙂
lw
In the Vegas area… I get krispy after day 4-5 tops. It is interesting to read the different dry time around different climates. It seems like after they are cut down… Anything outside the jar after the first few days means crumbly bugs, so I trim wet and put on the net…
Actually, when the buds start to get crispy, you should put them inside brown paper bags to allow the inside of bud to dry as the outside has. After one day, you will find the crispy part of the bud moist again. Also; If your buds are crispy in 4-5 days; One of 2 things, or both are occurring.
1. You fan is blowing directly on the hanging buds. Fan should provide breeze in drying room but, not be pointed directly towards buds, or they dry to fast.
2. The Humidity in your Room is too low and allows the outer bud to dry too fast.
lw
I just harvested my first crop of White Widow. I’m using a ReVolt CFL 150W, 8000 lumens color temp. 2700K flower/red as the primary grow light. I have 3 plain 150 Watt CFL’s along with it. Would I get a better yield if I got the 600 Watt HPS instead? I also would like to know if marijuana can be stored in the freezer.
Linda,
Yes, you would do considerably better. Buy this. I have 2 of these lamp systems.
https://www.amazon.com/iPower-GLSETX600DHMAC6-600-Watt-Digital-Dimmable/dp/B005GYRZV2?tag=greenrel-20
What are the best kind of lights to use in a 4×4 closet? Where can I buy these lights and lighting system? What kind of lights do I purchase? Can this be bought at Walmart? How big of pots do I get?
Joe,
This is what I use in that tent. This is what you need:
https://www.amazon.com/iPower-GLSETX600DHMAC6-600-Watt-Digital-Dimmable/dp/B005GYRZV2?tag=greenrel-20
Hey Robert! Great Article Mate. Is it Available in a .Pdf?
Hi John, nope sorry, just the blog article.
He is very supportive to his staff. Any kind of problem they have, he is there to accommodate
Hey, thanks a lot, I understand now. Can’t wait to get started now I have step by step guide. Will be joining the forum as I set up, looking foward to all your info 😛
As mentioned above; This is a recommended schedule for indoor grows. Primarily using clones but, seedlings were mentioned also. It is plainly stated that the 2 weeks grow cycle comes after you have grow strong clones or seedlings in a propagatio0n room and now they are ready to be moved into the grow room. 2 weeks is minimum for clones, and my preference is that you veg seedlings at least a month.
This article was also intended to use a shorter total grow period in order to keep the plants from growing too tall. Join our grow forum for a wide range of ideas and experienced growers can help you.
Happy growing! 🙂
Hey Robert, great help reading this, tho I’m confused on one thing are you suggesting vege plants for 3weeks and then change to 12/12?
Have tried to download grow bible 3 times haven’t received let me know what I’m doing wrong thanks
Hi Scott, all grow guides will be send to you when you start the download here: https://ilgm.com/grow-bible
Contact support at [email protected] if you have a problem with the download.
I can’t download it either. I got the grow schedule but no Bible.
Enjoyed reading this. I am a hydroponic grower and I am about to embark in a new system that incudes a 40 gallon reservoir and a 3 x 6 growing tray. Your suggestion of 1 plant per square foot was helpful. Also, I am about ready to harvest some of the “gold leaf” plants for the first time. The plants are absolutely gorgeous! Thanks again for your most valuable information.
[…] this complete Marijuana Grow Schedule with temperatures, humidity, watering and nutrients […]
Ok thank you. …I will
Follow the directions on the nutrient bottle. I do not use aptus?, and really never heard of it. The nutrient company should have a nutrient calculator on it’s website that would give you a schedule for applying nutrients throughout the grow. Otherwise; Follow directions on the bottle.
Again; This is a blog. You would be better served to join our forum.
I am using cyco coco in the 10 gal breathable bags from hydro farms. using gavita pro 1000 de lights with the ambassador pack from aptus growing the amnesia haze seeds from you
It all depends on how you are growing. I do not want to assume the methods you use. I suggest you download and read our Free Grow Bible. Or; Join our Support forum and give our staff and membership more details on your grow plans. We can definitely help you succeed
How often should I be feeding my plants a wk and how often should I be flushing that would really help thanks
If grapefruit diesel is anyway similar to NYCDiesel; The n it has a dominant Sativa pheno and needs a long grow period. Total grow from seed including Veg time, could be as long as 14 weeks, if you grow it to maturity.
If you veg it for 2 weeks at 16/8 photo period after 1st roots show and you have 4-5 alternating nodes on the stem, you can switch from 16/8 to 12/12 and induce flower early. This may allow you to finish the plant in 90-110 days. If: Sativa
How long would u grow some grapefruit diesel .. 9 weeks seems a little long ????
Im growing WW & NL both fem. Im in week 6 of flower they look great and filling in well Im growing in FF Ocean Forest and feeding with FF Big Bloom [ organic fert.] My question is should I flush ? Been feeding weekly. 4tbs per gallon. Should I add calmag at this stage or just continue what Im doing Also would it help to add a few 150w cfl under plants for better buds ?
Pat,
Don’t know what 4tbs per gallon is, but No. Do not use CalMag, andas far as flush; I would wait until I was ready to harvest, as long as I did not see any nutrient toxic issues in the plant.
How abour updating this article to reflect the use of LED grow lights?
Most growers are switching to LED, to save on energy.
We do not use LED grow lights.
[…] by heat and transpired moisture is blown away, which causes the plant to transpire more. Check this Marijuana watering and feeding schedule for more […]
ilove to plant marijuana
i try smoke the herbs
i am ang king of marijuana
What’s up Rob? I purchased some northern lights auto and had no problem with the delivery. I just had a question. Why do my autos start to wilt after about 12 hours of light? They are perfect all day!
hi, Rob need some advice I’m using your grow guide, I have a1.2 x1.2 x2M tent with a 4″ intake , 6 extract with carbon filters on a dual fan controller , a second 4″ extract with carbon filter, 2 x 600W hps lights with dual spectrum lamps, had one running for first week now both on,I have a wilma big 9 with 5 girls watering them once every 2 hours for 15 mins lights on only. Everything is looking good but the last 5 or 6 hours during lights on my girls are drooping once they have had their lights off time and then back on they look fine.any advice would be much appreciate cheers G.
lol you shouldn’t be growing if you don’t know anything about plant biology. you need to look into plant circadian rhythm. it amazes me how little amateur “growers” know about plants, yet you will throw every dime you have at expensive products and light setups. Crack open a grow book or two.
that seems like a lot of water. i water only when the soil is pretty dry
Anyone check out mainlining by nugbuckets? I tried it & it works great. Look for mainlining by nugbuckets in a search.
medMUser
Soil growers, check out Dr. Earth’s Potting Soil. It’s made for cannabis. In flower stage molasses & Epsom salts works great for those of us on small incomes. Use unsulphured molasses. I get mine from a health food store. I use 2 tbl spoons of each in a gal of water. medMUser
I ordered 9 fememised seeds,3 of each-WW,BL,BB. Two BB and ONE WW were small pale, immature seeds and did not sprout. The rest are beautiful so far. They are 38 days from sprouting,15inches tall and very full. Im using 1000w MH lamp 24 inches from tops.When can I cut clones and (more important) when can I begin the 12/12 flowering phase? Thanks
Dear Robert, I would like to buy some non-feminized autoflower seeds to try my hand at breeding. What do you suggest? Thank you.
i need advice on how to control the humidity in my grow tent.!
how many fans you got in your grow room,whats size of Grow Room, do you live in a place with Low Humidity(humidifier) or high(dehumidifier, better air circulation) hope this helps dude?
I have a 4x4x8 tent, 400 watt system, portable air conditioner on during lights on cycle, I live where the humidity is always high, so I put an de humidifier in the tent, I ran the hot exhaust out the top (made a duct) then out the window. I have no other way to control the humidity, without using a closed room.
Sorry, didn’t mean to send my last post yet. I’m going to get ur pot booster next week. Also I love the seeds as every one has sprouted. As long as I can stop killing them. Also I will be getting ur booster next week. Thanks for the seeds and the help.
This plant is about 2 weeks old and is growing well. But I was wondering when to top it. I don’t want to do it to soon but it seems like when I compare it to pics of yours it seems it’s small and I have already killed three seedlings so far. My first time and I know that I have a mountain of stuff to learn. The seeds I got from u r w/w and og
Robert, how many White Widow plants did yo have for this grow guide? Also how tall were they by harvest time and what was the overall or average yield per plant?
He tells you at the 9th Week Flowering Pargraph “1 Plant per 2ft”
I’m not a beginner nor am I an expert. I seem to have a green thumb. I like your seed offers, I’m trying to make up my mind on which strain to order.I’m leaning towards the OG kush. Kanabinalkid1.
I love your site im only on my therd grow I have learned a lot from you I really like the white widow autos I have it down im getting a full grow every month now its great cant wait to try your nutrents and see how much more I can get out each grow note im using two 450w leds and I could not ask for more I will be looking forward on trying your white widow autos
William…I am new to this forum and to growing. I was wondering when you said you are getting a full grow from white widow autos once a month? Do you mean that you have them cycled so a new plant matures each month? Certainly they take more than a month to grow and flower, don’t they? What is the approximate time from seedling to budding? Any info would be greatly appreciated.
Hey Mike,
You are asking a comment by a passer-by about something he posted 2 years ago.
Maybe I can answer you. William evidently planted at least one auto flower per month for 8 months give or take, and now he harvests once a month from that process. Hapy growing.
Hey MIke, I occasionally grow Auto Flowering plants when I’m pressed for time and need bud quick. I get my seeds from Amsterdam but I assume they work the same no matter where you get them. AF seeds will generally germ in 24-30 hours. Veg stage lasts about 1 month and Flower stage lasts about 1 month. These plants cannot be cloned unfortunately which makes them an expensive option but helpful when you’re in a time crunch. The ruderalis plant is not sensitive to light cycle either. Leave them on 18hr light/6hr dark the entire life of the plant.
I would like to grow from feminized seeds but my budget won’t let me this season. I have a grow going now and it will take me into November. I’m an indoor grower so I’ll get some of those White Widow seeds next year!
Flintz
Robert you are great . thx for this site and all your support with newsletters free guides and many good deals
Received my order in a week, BB, and WW, are doing well , my OG seeds are very slow , seem stunted (jagged leaves are starting but plant in barely out of soil! Is there a read on?
Got the Super Skunk seeds you shipped last week. I use a Miracle Grow machine with their rooting plugs for the seeds. 2 popped up in 2 days, we are at day 7 & 4 show no signs of plants. How long should I wait before declaring a seed a dud. Jim
I find fish ph not so good. Lemon juice wouldnt stay stable. But ph down from hydro shop works perfect. Nice n stable. Bottle lasts a life time. $10
dont believe your not using pc perfect nuits,, advanced nutes all the way….. canna hasnt a lookin
wait i threw some out and they came up outside
How do I get my ph down to 6, I am now at 7.5. I know if I add lime I can reduce to 7, I don’t know how to get lower.
PH up & PH down, bottle of magic that you can dump into your solution to raise or lower the ph, usually 1 tsp is good for 25 gallons, so be extra careful on how much you add. they wont respond to well to dramatic changes at an instant. “Happy Growing!”
sounds like its needing flushed to be honest, soil?
You can add coffee grounds and/or lemon juice to reduce (acidify) your ph. Try one cup of coffee grounds per plant or 2 tblsp. of lemon juice per gallon of water and then re-measure your ph. Continue this treatment until your ph drops down to about 6.5 or so.
Vinegar
Brilliant….. get on the forum you guys, there you’ll find all the help you need. From novice to mega experienced. I love it !
Try a product called PH down they sell it at most hydro stores an on ebay.
Thanks for sharing Ike
Jennifer,
I have (3) white widows seeds that did not germinate.
Hi Morgan, all sales questions can be directed to [email protected]
Leave them in water forever. Check them 3 days and then 3 days maybe 2weeks may go by. But they will pop if the others did
Use ph down solution. Get it on Amazon/on-line There are many other ways to accomplish ph down which are more complicated, you may want to check out on-line.
Go down to a pet store that carry fish supplies and buy some pH down.