If you are growing marijuana hydroponically, it’s crucial to know what kind of schedule to expect. This article covers growing marijuana schedule For hydroponics and what to expect, starting with the very first week of the vegetation stage.
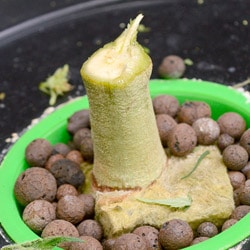
Seedlings therefore already need to have a number of internodes and cuttings must be well-rooted. It’s a good idea to check out the entirety of the hydroponic grow schedule before you even begin your grow season.
Why grow marijuana hydroponically
Prime advantage of growing marijuana hydroponically is that it grows 30–50% faster and often provides larger yields.
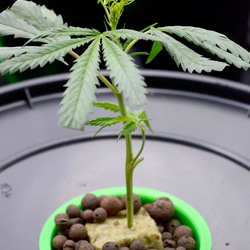
Read my article “How to make clones” if you need help making clones. And read my article “How to germinate marijuana seeds” for more information about germinating seeds. Germinate your seeds in rock wool cubes so you can transplant them easily to your hydro system. If you are growing in soil check the article “Growing schedule for soil”. Please leave your thoughts.
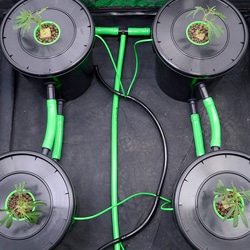
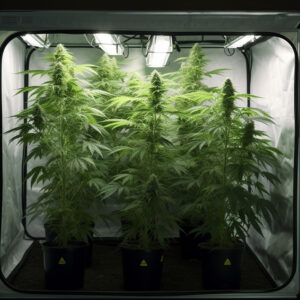
The setup used in this journal:
| 4 x Amnesia haze |
| 1 x 400 Watt MH (during vegetation) |
| 1 x 600 Watt HPS (during flowering) |
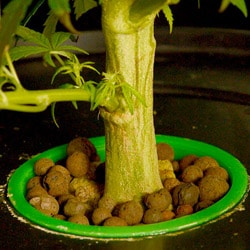
| Bubble Buckets |
| Bergman’s Plant Food |
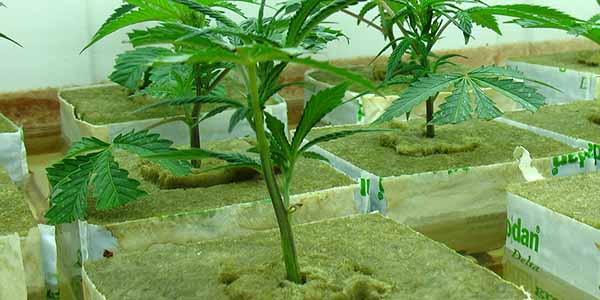
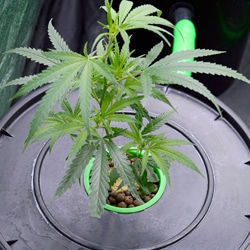
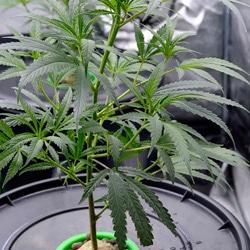
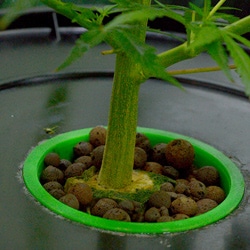
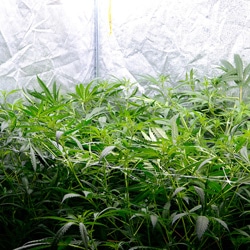
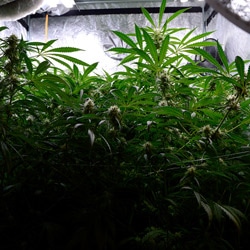
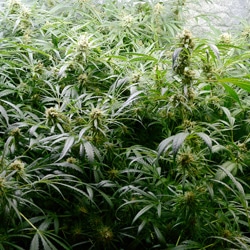
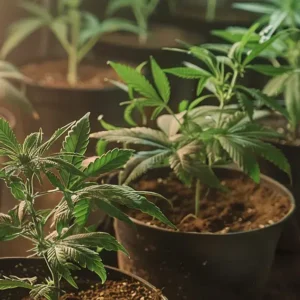
Week one of the vegetative phase


| Amount of light: 50% of the lamps on (400 Watt MH) |
| Light distance: 40 inches between lamp and plant |
| Light duration: 18 hours per day |
| Temperature for day/night: 73/64 degrees Fahrenheit |
| Water temperature: 70 degrees Fahrenheit |
| Humidity: 80% |
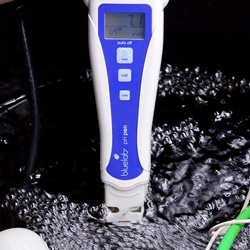
| pH level: 5.8 |
| TDS/EC: 650/1.3 |
The entire system should be set up and running for at least a full day (24 hours). All of the above environmental aspects need to be maintained during that time. Specifically, keep an eye on the water temperature (it should be around 70 degrees Fahrenheit). If you are having trouble keeping it warm enough, use a fish tank heater to warm it up.


For water that is too warm, simply add more water. Keep in mind that the pump itself will also be generating heat, so proceed accordingly. Make sure you are always checking the humidity and temperature of the grow room, at minimum every other day (but preferably every day).
Because this is the first week of the vegetative phase, it’s important to remember that plants use lots and lots of nitrogen. Therefore, make sure your fertilizer of choice has a lot of nitrogen. Bergman’s Seedling Fertilizer is the product specifically used in this hydroponic grow schedule, but anything with lots of nitrogen should be fine. It also helps out with root growth, which is critical during the first weeks of growth.
Download my free Grow Bible to learn more about hydroponic growing!
The TDS values and pH level need to be balanced before you add the plants into the system and buckets. These should also have a close eye kept on them; check at least every other day. The TDS values drop as your plants use up nutrients, and that makes the pH levels rise. Adjust accordingly as often as necessary (every two days, for example).

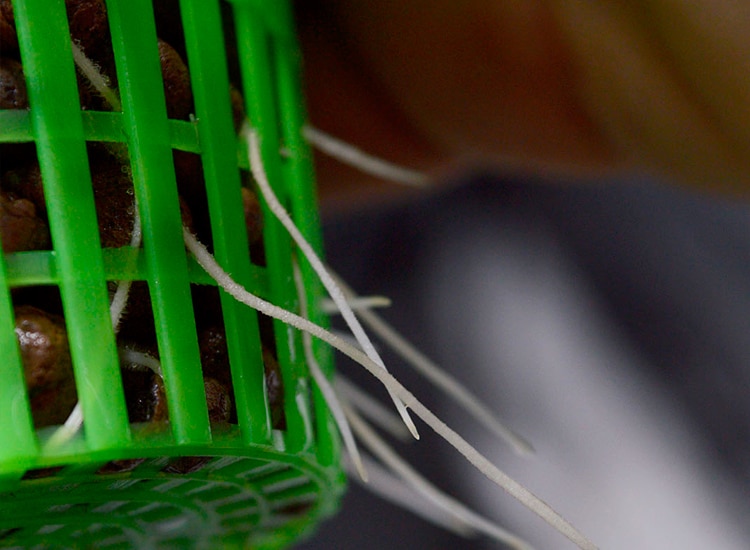
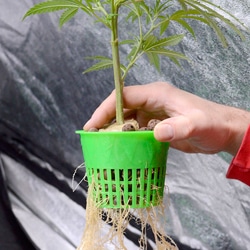
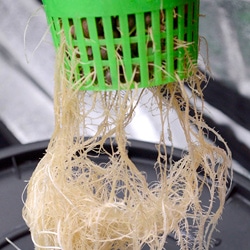
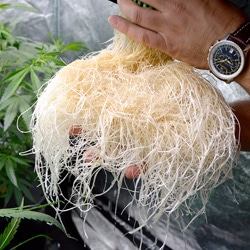
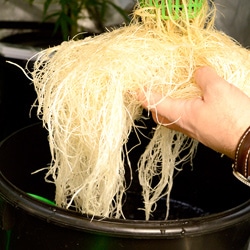
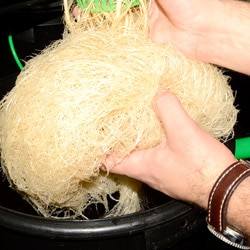
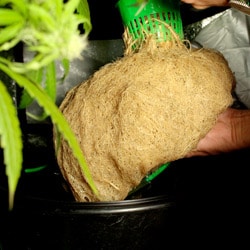
Make sure the roots are also maintaining health. Check them every other day. Be sure that, after this first week is over, their length is around the same as the plant’s height. Brown roots could be having root rot or could mean the water in your system is dirty.
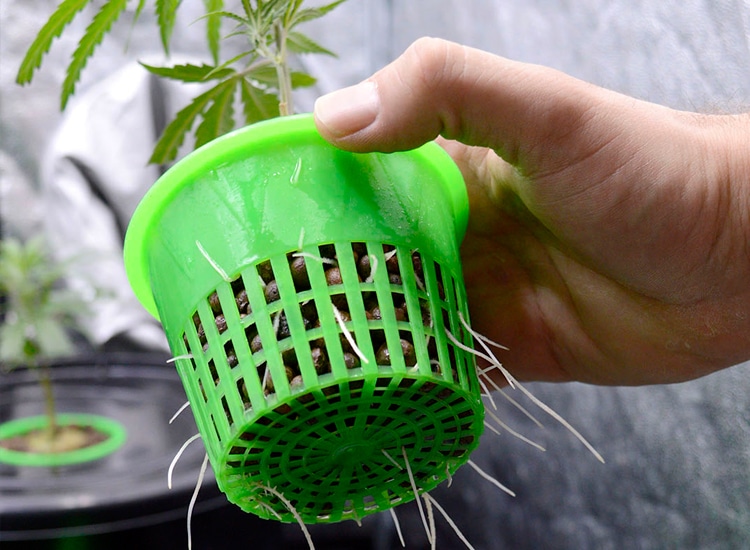
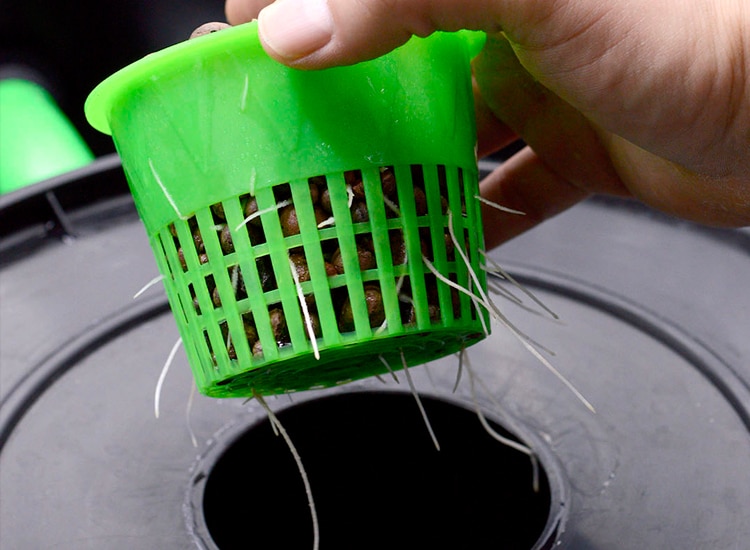
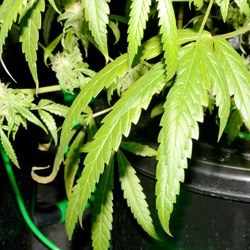
Roots start to grow
Your plants will be quite small during this phase, and they will be adjusting to the amount of light. For that reason, use MH lamps now instead of HPS lights, since MH lamps give more light that is in the white or blue part of the spectrum, which is better for early growth.
Keep up the humidity levels by spraying your plants with a plant spray on a daily basis. Waterproof floors can also be sprayed to add some moisture to the space. If your floors aren’t waterproof, you can cover them with a pond liner or something else to make the surface waterproof.
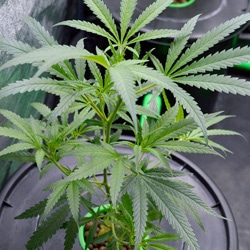
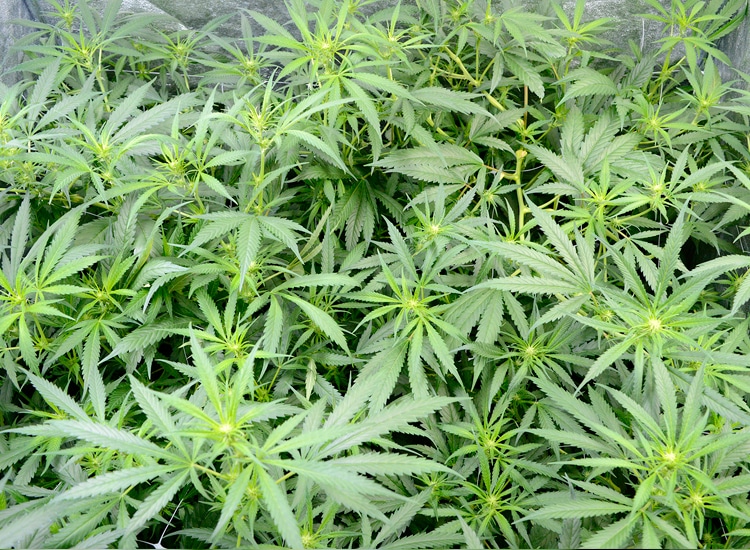
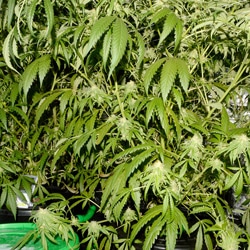
Week two of the vegetative phase
| Amount of light: 100% |
| Light distance: 20 inches |
| Light duration: 18 hours per day |
| Temperature day/night: 75/64 degrees Fahrenheit |
| Humidity: 80% |
| pH level: 5.8 |
| TDS/EC: 750/1.5 |
During the second week of the vegetative phase, you should make sure all the lamps are on, and the distance between the plant and the lamp is about 20 inches. That being said, be sure the temperature doesn’t get to be too high. If the temperature rises above 86 degrees Fahrenheit, the plants could start to burn.
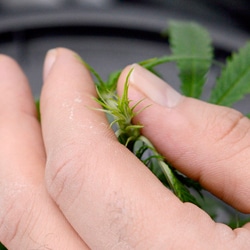
If you are planning on topping or fimming your plants, this is the perfect time to do so because they are mature enough to handle it but also have enough time to grow afterward.
Also read the article “Pruning marijuana plants” for more information about topping and pruning
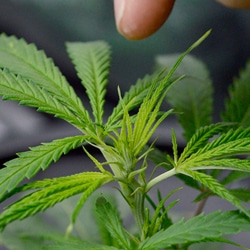
How to fim

If the tips of the leaves are starting to brown, the TDS levels might be too high (meaning your plants are experiencing nutrient burn). If that does happen, make sure to lower the TDS levels by around 35%. Also check the water level every now and then and add extra water if needed.
During this week you should get a fan and point it right over the plants, making them all move in the breeze a certain amount. If they are constantly being blown by a fan, they will develop stronger stems (which leads to better overall health).
Also read “Hydroponic marijuana growing indoors“
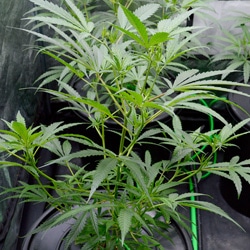
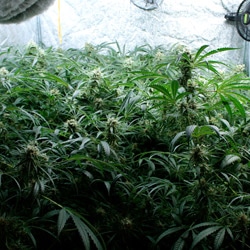
As soon as you start seeing the leaf tips of your different plants starting to touch, it’s time to begin the flowering phase. If you have lots of plants (12, for example) beneath a single lamp, you may even want to start the flowering phase after the first week of vegetative growth to avoid letting the plants get to be too huge for one lamp.
Week one of the flowering phase


| Amount of light: 100% (600-watt HPS) |
| Light distance: 20 inches |
| Light duration: 12 hours per day |
| Temperature day/night: 77/65 |
| Humidity: 70% |
| pH: 5.8 |
| TDS/EC: 850/1.7 |
When you lower the light cycle time from 18 hours to 12 hours per day, you are basically tricking your indoor plants into thinking that the autumn season is coming, meaning it “knows” it has to enter the flowering phase soon. It may take a while of this consistent schedule change before you actually notice that you plant is physically changing.
You should continue feeding your plant a large quantity of nitrogen since it’s still doing a lot of growing. After three weeks, you can start prioritizing phosphorus instead because that is used to produce flowers.

Aim your fan between the lamp and your plants, allowing the heat to be spread throughout the room rather than concentrated in one spot.
Flush out the system with fresh water if you’re changing up the nutrient cycle at all. Clean any dirty buckets and make sure the TDS and pH levels are readjusted.
Also, keep an eye on your plants themselves — check their leaves for discoloration, damage, or any other signs of worrisome conditions. Otherwise, you could have pests, nutrient deficiencies, or even nutrient toxicities. Make sure the roots are remaining as healthy as ever.
Week two of the flowering phase

| Amount of light: 100% |
| Light distance from plants: 20 inches |
| Light duration: 12 hours per day |
| Temperature day/night: 79/67 |
| Humidity: 70% |
| pH level: 5.8 |
| TDS/EC: 950/1.9 |
Stop topping your plants at this point, but you may continue pruning (removing the side shoots your plant doesn’t need). This will allow it to use its resources for primarily bud production.
At this point you can expect your plants to be growing quite quickly, meaning you should be frequently measuring the distance between the lamp and your plant to make sure it doesn’t shrink by too much, therefore burning the top leaves.


Plants that get too tall at this stage can be super cropped. That involves pinching the stem between your thumb and index finger and bending gently to help strengthen the stem.
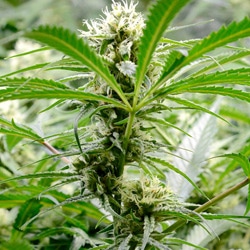
Week three of the flowering phase

| Amount of light: 100% |
| Light distance from plants: 20 inches |
| Light duration: 12 hours per day |
| Temperature day/night: 79/67 |
| Humidity: 60% |
| pH level: 5.8 |
| TDS/EC: 1050/2.1 (FP Bloom) |
You will start seeing the first flowers appearing and the growth of the plant slowing down a certain amount. Your plants will be taking in water at their maximum capacity, so make sure you are providing them with plenty.
The pH levels, TDS, and temperature should all still be regularly monitored. Smell the water to gauge its freshness.


Hopefully, you have already removed any male plants so they don’t fertilize your females. Make sure your leaves aren’t discolored, and the roots are white or off white. Flush the water out at the end of the week and then make sure to give it a couple days before adding nutrients again. This lets the plant use up all of the remaining nutrients.
Week four of the flowering phase


| Amount of light: 100% |
| Light distance from plants: 20 inches |
| Light duration: 12 hours per day |
| Temperature day/night: 80/67 |
| Humidity: 50% |
| pH level: 5.5 |
| TDS/EC: 1150/2.3 |
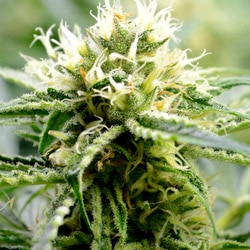
Buds should be popping up everywhere, and the smell should start emerging as well. This is a good time to switch your fertilizer so that your plants are getting more phosphorus instead of nitrogen. I used Bergman’s Flowertime Fertilizer in this grow journal.

Your plants won’t grow upwards anymore, but they will continue producing buds. Now is the last time that you can safely super crop them. Read this article for more information about super cropping.
Week five of the flowering phase
| Amount of light: 100% |
| Light distance from plants: 20 inches |
| Light duration: 12 hours per day |
| Temperature day/night: 80/67 degrees Fahrenheit |
| Humidity: 50% |
| pH level: 5.8 |
| TDS/EC: 1200/2.4 |
Keep an eye on the distance between the lamp and the tops of your plants. Your plants are going to need as much light as possible, so move the lamp as close as you can without burning the plant.


If your hand is uncomfortable under the light, your marijuana plants definitely are.
Week six of the flowering phase
| Amount of light: 100% |
| Light distance from plants: 20 inches |
| Light duration: 12 hours per day |
| Temperature day/night: 80/67 degrees Fahrenheit |
| Humidity: 50% |
| pH level: 5.8 |
| TDS/EC: 1250/2.5 |
Carbon dioxide, water, and nutrients will all be gobbled up by your plant at super high rates during this week. Be sure you still have a fan going to spread out the fresh air, and make sure that the buckets have enough water in them at all times. Some plants during this stage can use as much as a gallon of water per plant, per day!
Be sure to keep the environment optimal throughout this week, even if it is a challenge. Towards the end of this week, make sure the pH is up to 5.8 and don’t add any nutrients to make sure the pH level and TDS level are balanced.
Are you thinking about growing marijuana and need easy to grow seeds for beginners? Perhaps you usually buy your cannabis from a dispensary and want to save money by growing it yourself.

Buy beginner seeds
- Wide selection of autoflower seeds
- Our seeds are guaranteed to germinate
- Consistent heavy yields
- Guaranteed quality and delivery
- Get 24/7 grow support
Week seven of the flowering phase

| Amount of light: 100% |
| Light distance from plants: 20 inches |
| Light duration: 12 hours per day |
| Temperature day/night: 80/67 degrees Fahrenheit |
| Humidity: 50% |
| pH level: 5.5 |
| TDS/EC: 1300/2.4 (FP Bloom + FP Boost) |
The buds are likely looking quite large at this point, which means your plants are going to start needing potassium more than any other nutrient now. Bergman’s Plant Booster is a great fertilizer to switch to, but also use regular fertilizers designed for the flowering phase.

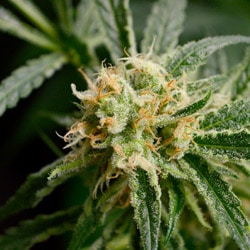
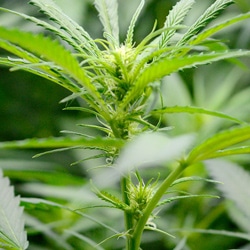
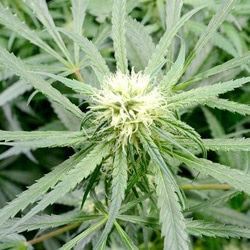
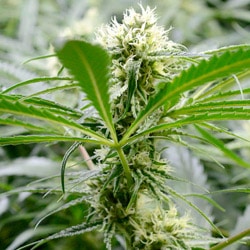
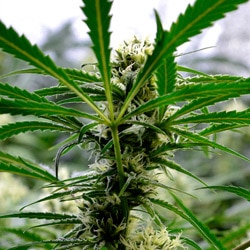
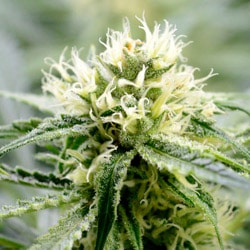
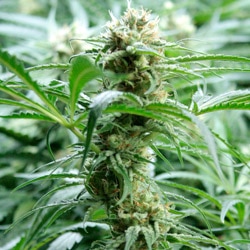
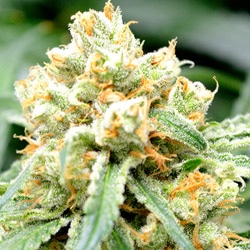
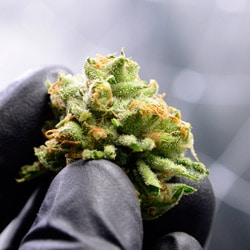
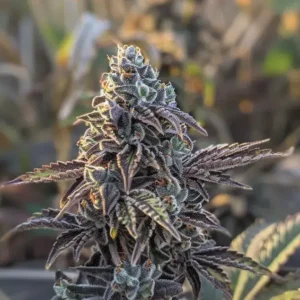
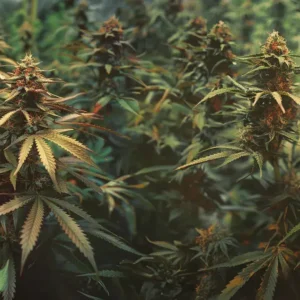
You can even start to see the THC now; the white layer on the leaves that directly surround the buds is just that. The more white this layer is, the healthier it is. If the color begins to turn orange, that simply means that harvest time is approaching.
Week eight of the flowering phase
| Amount of light: 100% |
| Light distance from plants: 20 inches |
| Light duration: 12 hours per day |
| Temperature day/night: 76/65 degrees Fahrenheit |
| Humidity: 50% |
| pH level: 5.8 |
| TDS/EC: 750/1.5 |
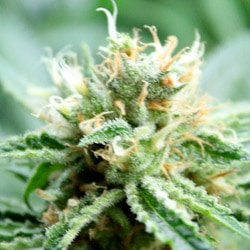
Your buds are still growing during this week, but mostly in the way of producing THC and becoming denser. Be sure the TDS level is a bit lower, as that will allow your plants to use up the rest of the nutrients and will clear the way for clean, chemical-free plants once you harvest them.
Leaves start turning yellow
If you begin to see the leaves at the base of your plants starting to yellow and die, you don’t need to worry this late in the game — it’s normal. The main thing you need to worry about is mold and leaf discoloration. If you see anything that looks remotely like mold, chop it off immediately and discard it.
Know how to perfectly time your harvest so you can maximize your yield. Download our free mini harvesting guide
Week nine of the flowering phase


| Amount of light: 100% |
| Light distance from plants: 20 inches |
| Light duration: 12 hours per day |
| Temperature day/night: 75/64 degrees Fahrenheit |
| Humidity: 50% |
| pH level: 5.5 |
| TDS/EC: 0 to 500/0 to 1.0 |
Lower the EC significantly so you can rid your plants of all the nutrients. Give them only water at the pH level of 5.5 until harvest time. This will help your marijuana taste better once you harvest it. Make sure there is no rot and that there are no pests, as those will be the ultimate destroyer of your plants.
Do you want to learn what’s the best time to harvest? Download my Harvest Guide here
Wait until the little hairs are at 80% brown before you harvest your plants. Your personal taste is going to be what determines the exact time when you harvest your marijuana plants, however. More about harvesting in my article “When to harvest marijuana plants”
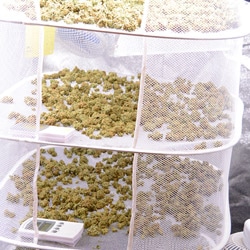
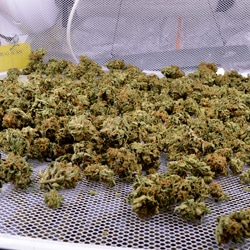
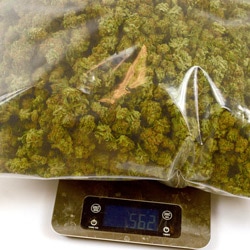
Here is a little picture gallery from the harvest (also a user chart). The yield was 562 grams (20 ounces) so not bad at all. Please leave questions or comments below in the comment section.


FAQ about growing hydroponics
What are the best cannabis strains perfect for hydroponics?
Here are top 5 cannabis strains best suited for hydroponics: Amnesia Haze, Gorilla Glue, Northern Lights, Critical and Giant White Haze
What is the best hydroponic system for beginners?
We recommend Deep Water Culture (DWC), because it is the easiest type of hydroponic system that you can build and maintain at home.
What is the biggest advantage of using hydroponic system for marijuana plants
Cannabis grows 30–50% faster and often provides larger yields.
How much do you yield on average? Do you trim wet or dry? Share your tips, comments or questions in the comments below…
Robert


What a great guide, I use it all the time. Can you extend veg stage to 3-4 weeks if you wanted bigger taller plants/bigger yields ?
Thanks
I’m a new grower, not sure of what leaves that may need to be trimmed off? I’m coming into my 3rd week.
Thank you for all this info. I am a novice and this is my second attempt. First time
It turned out to be hemp! I now grow from feminised seeds and strain specific (white widow) hydroponic set up. Plants looking happy and healthy so, hopefully I am on the right trackthis time.
Does it take 9 weeks of flowering for all strains grown in hydroponics? or should I follow the description of the strain listed?
1st time Hydro cropper, I.m trying to find out the frequency of watering during the flowering stage. Any help out there?
Good read well explaned absolutely no confusion at all well put totally understood.
I’m in Australia with 4 single buckets going its and daily I have to make sure the ph n ppms are on point need to link them all to a resivor that’s for sure so its less work I’m using proffessor a+b proffessor greener as cal mag and seaweed solition and now just turned them I’m using nimbin flower blue for budding going ok 1st dwc.
As far as water temperature. I would suggest 70 as maximum temperature and a few degrees lower would be better. Over 70 and things start to grow in the water
New grower just getting started. Learning alot from your instructions.
U have a great rightup. The one think I dont know is how long should each individual feeding cycle (turn pump on-run it maybe 20 min? And how often should u feed a day?
Confusing: your TDS instructions on the first few weeks are full strength. Yet, you say to use 1/4 at first. I did 750ppm on week two and noticed burnt tips immediately. Rinsed with 2.5L PH’d RO – took it to 500ish ppm and all is well.
I ordered 10 seeds and got 20 . and That was nice but
so far seven of those seeds did not germinate .
And yes I tried all the recommended processes .
Yes during the hydro schedu do you run feed water the whole week or feed and then run reg water, im just a little confused about the watering schedule, please help me,i hate not being sure of things,. I’m only having sucess with Peat moss and perlite so far. Thank u in advance
In hydro, we generally add fresh nutrients and then top off with ph’d 5.8 water. You can add as much as the original volumn. i.e. A 5 gallon bucket holds about 4 gallons allowing the netpot to be just at water level. Now; You can add 4 gallons of water to top it off when needed before a fresh full bucket of nutrients must be refreshed. Hope this helps. Go to out hydro area at the forum. Happy growing 😉
Hi guy.
I understand that tds is total desolved Solid. What does EC stand for???
Electromagnetic Current
Well Robert, you made my day because i saw in the pictures how to completely run the system! Robert, you are a real man and a champ at that!
hi just wondering the science (reason ) for dropping the ph to 5.5 during week 4 7 and 9 thanks in advance
Great info!
How often should I replace my reservoir water?
perry,
You do not flush between nutrient changes…you top off. This is refilling the bucket daily to the approriate level.
Carbon filter is used to filter the smell, while the exhaust is primarily for removing and replacing fresh cooler air. Using a carbon filter before the tent would not be as efficient.
I suggest you join ilgmforum.com and read about DWC. 🙂 Our members and staff will guide you.
when you say flush the nutrients out are you saying to move to a different DWC bucket that has only water in it for a few days and then making up a second batch of nutes before introducing the plants to it. I am asking because this is the first time growing marijuana and i start with dwc and a grow tent. so between nute changing does it have to be flushed with water and how long do i do that and what is the procedure if any to do it. also does the tent need outside air and or how much and can i prefilter that air with a carbon filter
I have a Ebb and Flow system and was wondering if you have a schedule for feeding. I am currently feeding three times daily, for 18 hour veg. every 8 hours, and for 12 hour flower every 4 hours. PH 5.8…
Groffrey,
Timing of watering events is determined by how liong it takes for the medium to dry out after a watering. 9 hours is too long not to run the pumps. In general; I usually tell growers to run pump on 15 minutes of each hour. This allows fresh nutrients once an hour to plants. And; The root zone won’t suffer from drying out, too much.
So 15 minutes on, 45 off, and vary from there according to how the plant reacts. We only water during lights on, which you seem to understand.
Perhaps you might look into our support forum. We have many generous members and expert staff to help you grow successfully from start to finish. 😉
Is there a way to print this without the superfluous stuff on the sides?
Hi Ben, you might want to copy it to a text editor and print from there 🙂
And how many lumens are required per light? Thanks so much
Hi! Great read. Quick question though, how many plants can grow under the 400w MH and 600w hps light? Ever tried using 1000w led Lights?
Jhawk,
How many plants can grow under a 400w or 600w is all about the footprint of the lamp. If you are quick flowering clones you can place more plants under the light, From seed with full veg period, I grow 2-4 plants under a 600w. Color makes no difference in footprint.
Efficient LED lamps are relatively new to the industry, and the best ones to buy range approx. 1500 dollars, so, no I have not used them. I am learning data and doing research on LED lamps and have bought 2 cheapies in order to teach our membership about LED.
As far as lumens; This is subjective and not as worried about in the LED world. I advise you to read up on lumens or join our support forum where there are many topics covering the subject. 🙂
Happy growing
I just harvested my black widow and I’m using a 300 W LED Full spectrum white light I took it all the way from seed to harvest with the 300watt light
just wanted to tell the team i have been growing hydroponics, well if you call growing in coir hydroponics under a 600w hps for a few years now and recently i tried your nutrients,and do have to say,WOW.Thank’s Robert they grow really nice buds luv your newsletter & lab
We’re do I get of cush seed from North calforina
Hi Danny, I’m not sure I follow your question but we ship our seeds anywhere in Cali 🙂
But what to do with leaves? do you have article?
Since i’m a newbie to growing and I started to learn hydro, the information and handbooks you provided have been great. Of course I’m still learning from and with my plants and trying to get better at it. And again, thanks for the information.
Awesome Stephen, glad to help out!
I got 8 oz from Robert’s feminized Ww seeds. There is a lot of technique- go to the support forum.
I see more like 4 oz, not a lbs. This is more like sell pitch to me. I have been growing for years and there is no way they got a lbs out of them small plants. Please keep in mind once the flower drys, it is only one quarter of the weight when wet.
Is this yield 562 gram for per plant!!
This is a great growing journal and gives a lot of info, jus one question, how big was the grow tant you used, and what was exact distance of the gap between the plants?
thanks
I notice not much growth during the 7, 8 and 9 the week flowering. During the 7th week the PH was at 5.5, you shocked the plant. You hurt it and at very late stage of blooming. Not good. That is why your buds are so small. I have a plant now 13 feet in diameter and only 3 feet high. I am guesstimating more that a pound for one plant! Try Cyco, it is just bad ass!
White Widow….Timeline, Seed to seedling / Veg to flower? About how many weeks is average for each stage of development??? My biggie is defining the timeline from seedling to the time I go to veg and change my lighting to 18/6…(indoor in 5 gallon buckets and soil)
When desalting plants with hydro, keep ph at 5.5 for 1 hours then raise thoroughly with clean water. Then add fresh nutes and adjust ph to 5.8!
Im wondering how many times u changed the water in this grow? Also i was thinking about doin your online course but im wondering how does it work with my nutes cuz i dont use the nutes u hav for sale on your site?
Hi Ike,
these kinds of questions are best suited for the support forum. Our experts there can answer all your grow related questions.
Hi ilgm team I read this article on hydro and soil , I think you are clever people with horticulture , well done . I learnt some things .
Slick,
Airy buds are caused usually due to inadequate light. In hydro you need to keep PH at 5.8
6.5 is way too high for hydro.
I recommend you join our support forum where we have many helpful growers willing to share knowledge with you.
Happy growing. 🙂
Environment can make a big difference. PH: keep it at 5.8 is best for hydro. I normally get 7 to 8 oz per plant (indoors). I am now growing CW and BD, guessing around 12 oz per plant (designed reflective adjustable walls and lighting system that can go X, Y, Z) this grow (2 plants only at a time). I only get my seeds from I love Growing Marijuana. Thanks!!!!!! If something goes wrong ILGM is very quick about helping a person with issues. Excellent customer service! They can keep their pills, because I love my bud!
I’m using the 3 foot box also and even upgraded to the quasar led light, but my yield is very small. The quality is great but it’s hardly worth the effort. I have used your auto flower and non autoflower seeds with the same results. The buds are very airy and small. Lots of air from the pump, great nutes and my ph is always between 5.5 and 6.5. Dont know why my buds are so anemic and small.
Sounds a bit like too much heat? Dont know if u figured it out yet?
Robert do you’re nutrientsts work in hydroponic systems?
Thank you so much for all the help
I am new to growing and need some assistance to get started. What is the easiest and cheapest way to get started. I have one sprouting and would like to learn how.
Hi Anthony, the fastest way to get help is to hop onto our support forum and post your questions. Our experts and other growers will be there to help you out 😀
great reading when you refer to 1st & 2nd week of vegetative phase does it starts about 4 weeks after the seed germinates and when cloning the veggie state you would start counting the weeks right after you established a small root system outside of the net cup?
Great stuff does the pump have to be on all the time or only during lighting
Water pump? Depends on what medium you are using mate
You need air pumps to keep oxygenating the reservoir or the roots will drown due to lack of Oxygen.
Happy growing.
I bought your smallest grow box,,the lights cannot be moved. Is it possible to grow this much in my box hydrophonically?? Please let me know. Also,,flowering after a couple of weeks?? Also, I plan on buying feminine seeds from you.
John,
We do not sell grow boxes.
As far as can you grow this much; in reference to what? Perhaps you would be better off by joining our support forum. We can help you much better dealing with a small grow box over at ilovegrowingmarijuana.nl
I love this stuff! Thank you for all this wealth of information. In no time just reading little snippets of info here and there I’ve learned more then enough from you guys. Ilgm peace!